Saturday, October 22, 2016

Enable softkey in redmi Note 2

Become common knowledge redmi Note 2 is often a problem occurs with capacitive buttons key. And that if we take it to the service center will be reimbursed the total lcd + capacitive key. Because spare parts considering a shame if it all changed, when broken only capacitive key. So another way to resolve this problem is to ask softkey to add the following command..
But before hp must have been at the root if it is not then it can be read in a previous article in http://tipstrikteknik.blogspot.co.id/2016/10/installing-twrp-and-su-root-to-xiaomi.html

If so, at HP please install ES File Explorer can be obtained in the Play Store. In ES File Explorer enable Root Explorer and give root privileges.
After that go to the directory /System on build.prop file on line later add the following command line:


qemu.hw.mainkeys=0
 

Then reboot if successful would look like this..


To avoid confusion Button lights turn off by going to Settings --> additional settings --> Buttons and the disabled in the Button lights.
Not until here also switch off the capacitive keys in software in order to conserve battery power and reduce the error in a way to disable the following command line
In ES File Explorer go to the directory /system/usr/keylayout and edit files Generic.kl and give the remark sign (#) at:

 # key 139 MENU VIRTUAL
 # key 158 BACK VIRTUAL
 # key 172 HOME VIRTUAL

then save and reboot HP. Done .....
   

Installing TWRP and SU root to Xiaomi Redmi Note 2 using a pc / laptop

I think this is the most convenient way than others. Which need to be prepared before the install is as follows

Equipment:
1. PC or laptop
2. The built-in USB Cable
Software:
1. MI PC Suite (can be downloaded here)
2. ADB driver (can be downloaded here)
3. Tools TWRP + SU (Download TWRP, SuperSU)

How Flashing TWRP redmi note 2
===================================================================
1. Install USB drivers on your PC
2. Extract the ADB Drivers in a specific folder
3. Extract TWRP Recovery into a ADB folder Drivers earlier, Rename TWRP so (recovery.img)
4. Turn off Redmi Note 2, enter into fastboot mode by pressing (Power + Volume button below the screen off state)
5. Connect redmi Note 2 via a data cable to a PC / Laptop

See PC into the ADB folder
Right-click the folder "ADB TOOL" by pressing the "SHIFT", select Open Command Prompt
Last type "fastboot flash recovery recovery.img", then enter.

How Flash SuperSU redmi note 2
====================================================================
Put the file on the memory card SuperSu.zip
 Turn off the Hp, enter TWRP, press (Power + Volume up button) hold the two keys to successful entry
After signing in TWRP recovery, flash as usual.

Flashing process as shown in the picture below


This step has been successfully tested in redmi Note 2 Global MIUI 8.0 Stable

Wednesday, March 9, 2016

Flashing Guide Xiaomi Redmi Note 2

I bought Xiaomi Redmi Note 2 of the online shop with a distributor warranty. After I go and check it turns using fake rom. MIUI its inscribed V8.7.50LHMCNCH that the original version is V6.7.5.0LHMCNCH. I don't know the exact reason why the distributor to change to a false version of what it was because they wanted to escape from the responsibility of warranty or other I do not know. But definitely this action is not justified because it harms consumers.

Many problems of this distributor version that we could not have a normal system update, many applications are not important who actually slow down the performance of mobile phones we also can not log into the MI account. For that we need to revert to the original version by means of flashing ..


Redmi note 2 that I bought is china version then what distinguishes the global version? The following explanation ..

China Build:
The China Build doesn't contain Google Apps and Services (GAPPS) and contains some Chinese apps and services, which according to some is called bloatware, but for Chinese people those are actually very useful. The problem of not having GAPPS can be easily solved by heading to this thread: Find all the Google Apps in Google installer! 

Global Build:
Preferred by many, this build comes with full GAPPS without the Chinese apps and services. Usually updated at a later period than the China build, the Global Build comes with English as the default language, with multilanguages for certain devices.The Global Build usually comes with only Stable ROMs.

Note:
Currently China Stable Rom(Fastboot rom) only available.
If you want global rom please wait for launch global market.


What are the differences between China Mobile 4G and China Unicom 4G?
  • China Mobile 4G - This is the 2G/3G/4G band which China Mobile uses. China Mobile 4G  was designed specifically for the Chinese mainland and is used only by China Mobile.
  • China Unicom 4G  - 4G phones are marketed as China Unicom phones in China, but in actual fact LTE models are compatible with a number of international 2G/3G/4G networks.
Using Mi Flash Tool
  1. Download MIUI ROM Flashing Tool
  2.  Select the right MIUI ROM version for your phone from the listed below, and download the corresponding package file.  If you want Global version rom, download Latest Global Stable Fastboot Rom
    If you want China version rom, download Latest China Stable Fastboot Rom
  3. Turn off the device. Press the Volume– key and the Power button at the same time to enter
    Fastboot mode. Then connect the device to the Windows PC/laptop via a micro USB 
  4. Double click on the downloaded ROM file to decompress it. Open the file folder for the
    decompressed ROM pack, and copy its path on the computer.
     
  5. Decompress the MIUI ROM flashing tool downloaded in Step 1, and double click on it to install
    (if there is security warning, select 'Run'). After installation is completed, open MiFlash.exe and
    paste into the address bar the ROM file folder path copied in the last step.
    Click on the first button (circled out in yellow) to Refresh, and MiFlash should automatically
    recognize the device. Then click the second button (circled out in red) to flash the ROM file to
    the device.
  6. successfully installed. Then your device should automatically boot to the new version.
If the flashing guide could not help you, please download Mi PC Suite here
(After Mi PC Suite is installed, make sure that your phone is in fastboot mode, connect your
phone to a computer, and select the correct ROM file to flash)

Monday, February 29, 2016

How To Fix Low incoming call volume on android smartphone


Disclaimer: This worked on my smartphone, and it should work on yours too. But do not experimente because you could damage your speaker. If sound is too loud, decrese it by Volume Down button while in middle of phone call.

Requirements: You will need a phone with MTK (Mediatek) chipset. If you are not sure, google your smartphone and search for information under CPU or CHIPSET. I do not know if it works with other chipsets.

Download MTKEngineerMode and install this app on yours android


or go to your phone dialer and tipe: *#*#3646633#*#*

  • An EngineerMode will appear, swipe left to get to Hardware Testing, tap on Audio and than tap on Normal Mode.
  • Audio_ModeSetting will appear as on picture.
  • Select [sph]
  • Change values:
    level 6 = 155 (origin value 136)
    level 5 = 140 (origin value 124)
    level 4 = 125 (origin value 112)
    level 3 = 110 (origin value 100)
    level 2 = 100 (origin value 88)
    level 1 = 86 (origin value 76)
    level 0 = 75 (origin value 64)
     
  • Repeat the same for [sph2]

  • Go back to Speech Enhancement
  • Change Common Parametre to Normal Mode
  • Select parametre 7, and set it to 96 (origin value 64)
  • Select parametre 6, set to 300 (origin value 400), supposedly adds a bit more bass to the audio that's it. (Volume is significantly boosted and voice sounds more natural).

Thursday, January 28, 2016

Flashing Guide INFINIX X510

I have an Infinix Hot 2 (X510) issued by the Indonesian distributor. At the time of the update to android 6 (Marshmallow) phone becomes slow and all the data residing in the internal memory is lost. And more strange little remaining memory capacity.
So I took the initiative to restore to a previous system that is to android 5.1.1 (Lollipop).
Previous first download the tools here

 1. After the download is complete, double-click to run the compressed file, open the folder, as shown.

2. Extracting archive Infinix_Flash_Tool_exe_Windows_V1.0
3. Double-click to open the application flash_tool. exe
4. Click this button 


5. Enter the package folder, select the figure below, click on Openselect the figure below, click on Open


6. After the software has finished loading click this button.


7. The phone off, USB connected to the computer, wait for the download to complete


After performing the steps as above normal my phone back to the lollipop as I bought the first time. In order to update the system does not return to the marshmallow turn off notifications on updates to existing systems improved version.

Sunday, May 17, 2015

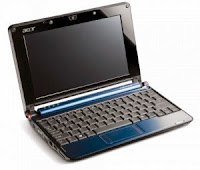
How to handle the Acer Aspire One Dead

The topic of this discussion is about how to handle the Acer Aspire One Dead. Maybe you are one of the experienced cases Acer Aspire One Dead. You do not need to worry, because we will provide a solution to these problems.

How to Service Acer ASPIRE ONE Dead.
Problem Indications:
When the Acer Aspire One is turned on by pressing its power button, the screen does not display any blank alias. But led around the power button lights up green. And there are no signs that the ACER ASPIRE ONE will live and proceed into the windows.

Cause Acer Aspire One Dead:
Death of Acer Aspire One is caused by a BIOS program that is damaged or corrupted data occurs BIOS Acer Aspire One. This is likely to occur as a result of a bug in the BIOS Acer Aspire One or the default from the factory.

How to Service Acer Aspire One Dead:

  •  Prepare Flasdisk 2Gb maximum, then the flasdisk format with FAT partitions. Just for info, we use a 2 Gb kingston pendrive brand black color.
  •  Download File BIOS Acer Aspire One, the following link: BIOS_Acer_One.zip or in Mirror
  •  Extract the zip file, and then extract the file again extracted earlier and copy 2 files in it that FLASHIT.EXE and ZG5IA32.FD to flasdisk directly without folder / directory.
  • Plug in the USB port Flasdisk left netbook Acer Aspire One
  • Plug the Acer Aspire One netbook Carger you.
  • Press the Esc key and then hold down Fn and then press the power button one time.
  • After about 15-30 seconds, release the Fn + Esc. Then the power button will be blinking
  • Press the power button again, then the light will be blinking flasddisk, a sign that the BIOS file in flasdisk being accessed (important .. !!! let some time because the process is running despite power visible light is not on.)
  • Wait a few minutes, then power light will stop blinking and then a netbook will restart by itself.
  • After the restart, the Acer Aspire One will return to normal life.
  • Recovery Process Bios Acer Aspire One is not more than 10 minutes.

Good luck!

How to register blog to search engines?

Many ways that we can do so we can blog known and visited, among others, is our diligently blog walking or visiting other people's blogs, register to various aggregators, and the most effective is through search engines or search engines.


# Register to Google
To sign up to Google, please visit http://www.google.com/addurl/, if it is located on the registration page there are several steps that should be done, that is fill in the form provided
:# URL ► Fill in the URL of your blog.
# Comments ► Fill in the keyword or keywords that relate to your blog
# Fill in the empty boxes with letters Verification available
# Click the Add URL
# Done.

# Register to Yahoo!
To sign up for yahoo! please visit https://siteexplorer.search.yahoo.com/submit to register to yahoo must first have a yahoo account, because in need login to yahoo account. For those who do not have an account yahoo (yahoo email) please make first, and those who already have stayed in login. If already logged later already available columns for the contents, please fill in the fields with your URL and then click the Add URL, is completed. If you want to enter the feed address and gentlemen, could put it. Remember, in the feed address just add atom.xml blogger behind the blog URL, eg for my blog has a feed address as follows:

http://tipstrikteknik.blogspot.com/atom.xml
or can use the www:
http://www.tipstrikteknikl.blogspot.com/atom.xml

# Register to Msn
 To register to Msn, please visit http://search.msn.com/docs/submit.aspx?FORM=WSDD2 please fill verification letter and the URL in the box provided, then click the Submit URL, is completed.
If the desire to have more, that URL on dozens of blogs indexed search engine, you can use the help site submitter. Try just click below:

http://freewebsubmission.com

Your job is only fill in the URL address of his blog, and write down any email address, then click the Submit Your Site.
If you want faster famous trying to do a ping to various aggregators, please click below:
http://pingoat.com
you just fill out the form provided.
Have your blog indexed in google? try to enter the address of your blog on google search engine

And lastly don't forget If your friend's blog is indexed in google, ask for a link exchange, or post a comment on their blog, so that in the blog there is a link toward our blog.

The more links that point to our blog, the faster blogs indexed search engine.

Tuesday, March 24, 2015

Acer Backup Manager

As in the previous discussion, that the Acer through New Tech Infosystems Inc. issued a backup software that is reliable and easy for users to secure any documents in a laptop. By determining where the file or directory to be backed up then the period of scheduled Acer Backup Manager to perform these jobs on a regular basis.In some types of laptops such as the Acer Aspire 4736 series has instilled this feature in a special button labeled Acer Backup Manager, it means that the button will not work if the software is not installed.

If you have this type of laptop will be mandatory to install this software if you do not want the key is left in vain. Does not rule out also for another type of Acer laptop was not complete if it does not install this software. When we press the button or click the icon Acer Backup Manager will display the menu as shown below. 

In the view menu looks simple, easy to understand and most importantly, reliable.To enjoy this software, you can download it for free here
Acer Backup Manager basic update version 2.0.0.63

In addition, if you have not installed 4.07.3008 PowerSmart Manager can be downloaded  here

Enjoy...

Wednesday, March 18, 2015

Acer Empowering Technology

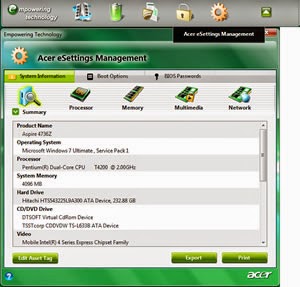
Some people there who do not know that Acer issued a fairly good software as support for laptop products in the market, some are free and some are paid, popularized under the name Empowering Technology.
Usually included in one bundle with a certain type of laptop there are even some planted in the hardware in the form of special keys as a form of features offered. One example of the older products such as Aspire 4736 Series has been accompanied Empowering Technology features and its plant in some keys such as Acer PowerSmart Manager, Acer Backup Manager and common functions such as volume, Bluetooth and Wifi.However, in the purchase application is not included in the driver CD but through the mechanism of downloading at Acer's official website (support.acer.com).Special Acer Backup Manager will be discussed separately in other occasions because the software is actually paid as supported by NewTech Infosystems, Inc. as a third party.
Acer Empowering Technology Framework 3 for Windows 7
Tested in Acer Aspire 4736 series 64Bit


There are stages in installing software Acer Empowering, following stepnya:Make sure you've installed Launch Manager is usually included in the CD driver please update your existing version if it is lower than the following version 3.0.06 LaunchManager Dritek  Download
Next we install applications
  • eFramework 3.0.3011  Download     ( installed the first time )


    Acer Empowering Technology Framework 2
    Tested in Acer Aspire 2920

    LaunchManager Dritek 3.0.04   Download


    • eFramework 2.5.4301   Download  ( installed the first time )
    • ePowerManagement 2.5.4311   Download